Recipes

Wednesday, February 29, 2012

Stubborn baby fat? Go away!!

Today's blog is going to be short and sweet because my angel face, Little M, is sleeping peacefully and this is the only time I get to workout uninterrupted. For some reason, I have this little pudge on the bottom half of my belly that I cannot get rid of and it's driving me insane (this may be because I'm nursing but not an excuse for me)! I'm below my pre-baby weight, but am not as toned as I would like and definitely do not have the stomach I would like. So you ask, "What are you going to do about it?" And I reply with, "BODYROCK!" Free 12 minute workouts with all the modifications you need for any fitness level. This is one of the best websites I have stumbled upon. I have determined from now on that I will: eat healthy (I'll have a cheat day every now and again), bodyrock everyday, include an extra ab or butt workout on top of it, and I will get rid of this stubborn under-the-belly, baby fat that is hanging on. I will have these abs:

What you need to be armed with to do the same:
The Bodyrock website
Weights
Healthy eating habits...know what fruits, vegetables, and complex carbs work for your body and not against it
 These are vegetables, but don't forget about oatmeal, oatbran, whole grain bread, sweet potatoes, and squash. Those are all healthy, yummy carbs to eat.
Determination
under the belly fat ab workouts

Here's a few more inspirational photos for you:
Now go conquer your goals!!!

Sunday, February 26, 2012

Gorgeous, Rustic DIY Headboard: $15 and easy to make!

My fence post headboard!
Since knowing I was moving to Colorado (and now that I have moved), I have been searching for inexpensive, EASY DIY ways to decorate my home. I stumbled across this blog that had a very cute DIY for a love headboard. After seeing it, I knew that Helpful Husband and I could make one of these!


Other blog's headboard
Luckily for me, my parents had just replaced the fence at their house and my dad (who always keeps things) kept a few extra fence posts in case they were ever needed. When I found out my dad had kept the old fence post, I almost did a jig! I also knew that my dad had all the tools Helpful Husband and I could possibly need to put this headboard together (thankfully, we were still at parents moving packing our stuff). This headboard took very little effort and time. Here are the instructions

What you need:
Old fence boards + 3 extra (measure how tall you want your headboard and that is how many boards you use)
2 (1x4) pieces of wood the length of the fence post
Screws
Sand paper or electric sander
Sealant
Paint brush
Saw (this is optional because Home Depot will do so many cuts for free!)

Planks screwed into boards

Up close look. One nail in each board


Decide which side of your fence boards will face out. Lay that side face down. Take the extra fence boards that you saved and cut them to the height of your headboard. These will be the planks that all of the boards screw into. Lay these 3 pieces on top of the boards (the side that will face the wall) and screw them in.  Next sand the front side of your headboard! Then put a coat of sealant on your headboard (I only did the front side but you can do both if you want). You will want to air your headboard out very well because the sealant has a terrible smell!
Once you have sealed your headboard, it should look like this:


 After your headboard is sealed and airing out, you will want to work with your 1x 4 pieces. If you have a saw you can cut it yourself or you can have Home Depot cut it for free when you buy this piece. Take the 1x4 and saw it in half at an angle. It will look like this:
Angled cut view.

angled wood cute
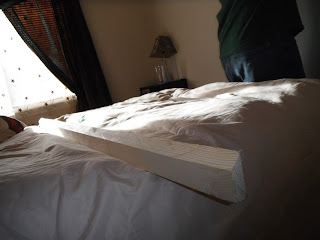
Once they are cut, you are going to screw one side into the studs on the wall and the other side into the headboard. Be sure to measure carefully how far apart they are and mark this on your headboard! The wood pieces on the wall will have the angles facing up while the wood pieces on the headboard will have the angles facing down. Then you just set the down facing angles on the headboard onto the up facing angles on the wall and your headboard is hung! I know it sounds complicated, but it really isn't and there are more pictures below. The hardest part is measuring everything and making sure the 1x4s on the wall match with the 1x4s on the headboard. Look below for pictures.
1x4s on the headboard


1x4s on the wall
Angled down on the headboard

Angled up on the wall
Fitted together side view from a different angle

fitted together side view


finished project up close

finished project further away!

Quick price breakdown:
Old fence boards: free
Screws: free or about $2 if you don't have any
1x4s: free or about $2.50 if you don't have any
Sealant: $8 to $9
Paint brush: free or roughly $3
Sand paper: free or if you don't have any (not sure of the price but pretty cheap)
Saw: free if you have it or free if  Home Depot cuts the woods (after 2 to 3 cuts, they charge $0.25)

 Now go tackle this project and make yourself a headboard for $15-$20 or less! Don't forget to let me know how it goes!


Friday, February 24, 2012

Corn-free enchilada lasagna

My enchilada lasagna

Today I ran across this beautiful looking enchilada lasagna and knew I had to make it for dinner. There was only one problem (ok maybe 2 problems): the recipe calls for corn tortillas and Campbells' condensed soup (which also contains corn products) and I'm extremely allergic to corn! Even though I'm sure the original recipe is delicious, I set out on a quest to make this enchilada lasagna corn-free and also healthier. It was relatively easy to make and took about 20 minutes prep time and 20 minutes cook time. I also cut my recipe in half since it is just Helpful Hubby and me eating, but I will include the regular portion sizes to the side in parentheses. My recipe fits in an 8x8 glass casserole dish while the original recipe fits in a 9x13 casserole dish.

Ingredients:
4 to 5 whole wheat tortillas (as many as needed)
2 1/2 cups reduced fat Mexican blend cheese (5 cups)
2 chicken breasts cooked and chopped to bite size (1 lb)
2 oz canned, chopped, and drained green chilies (1/4 cup)
Salt and pepper to taste
1/2 tsp cumin (1 tsp)
1/4  cup sour cream
1/2 cup fat free Greek yogurt (original recipe calls for 1 1/2 cups sour cream not Greek yogurt, but I wanted to make it healthier and I couldn't taste the difference!)
1 cup homemade cream of chicken/ celery soup (2 cups)

Since I am allergic to condensed soup, I found this delicious homemade cream of chicken soup recipe.

Ingredients:
  • 2 unsalted tablespoons butter
  • 3 tablespoons all-purpose flour
  • 1/2 cup low sodium chicken broth
  • 1/2 cup low-fat or fat free milk
  • salt and pepper to taste
  • celery seed to taste
Preparation:

 Melt butter in a saucepan over medium-low heat. Stir in flour; keep stirring until smooth and bubbly. Remove from heat and add the chicken broth and milk, a little at a time, stirring to keep smooth. Return to heat. Bring sauce to a gentle boil; cook, stirring constantly, until it thickens. Taste and add salt and pepper, as needed to taste.
Use in casseroles in place of condensed cream soups.


Now for the cooking instructions:
Heat a skillet with roughly 2 tablespoons EVOO to just over medium heat. Add 2 chicken breasts and salt and pepper to taste. Allow them to cook through while browning each side. Preheat oven to 425. While the chicken cooks, cook the cream of chicken soup as directed above. The cream of chicken soup recipe makes 1 cup so you will need to double it if making the original recipe size. Once the soup base is cooked, mix it in a bowl with the sour cream, yogurt, green chilies, and cumin. Your chicken should now be finished cooking. So give it a quick chop into bite-sized pieces and you are ready to start layering your enchilada lasagna! In your glass pan, first spread the cream mix, then add a layer of tortillas, chicken, and then cheese. You should be able to make 3 layers with the last layer ending in cheese on top. Pop in the oven and cook for 20 minutes until the cheese is melted and golden brown. Then enjoy this corn-free, healthy version of enchilada lasagna

*It includes low-fat dairy, cheese, and even the whole wheat tortillas are a complex carbohydrates. I served this dinner with freshly steamed broccoli and Helpful Husband said it was delicious!

Wednesday, February 22, 2012

Money: Get in my Wallet!

If you've seen the Austin Powers' movies, you probably know the "Get in my belly" reference. In this case I want my money to get back in my wallet or preferably stay there. Here are a few money saving tips to help your money get back in your wallet.

mop bucket
Tip # 1: I know, I know...you're wondering, "What is this a picture of? A mop bucket? And how can that save me money?"  I know it seems odd, but it most definitely can save you money! I have to give the credit to my mom because she clued me in to this money saving tip. If you have a mop bucket (or any clean bucket really) laying around your house, start putting it to good use! Everyone has to warm up the shower before they get in, right? Well, while your water is warming, put the bucket under the stream and let it collect the clean water. Set it outside the shower while you wash up. After you have toweled off, pour the extra water into your washing machine (this may only work if you have a top loader...not sure if front loaders can hold water in them when they are not washing). After a couple of showers, you will have almost an entire loads worth of water. I actually didn't think this was worthwhile until I started doing it and seeing how much water I actually saved. Try it! You'll be amazed!
FYI: This also helps with water waste in drought-prone areas of the country and is a great way to teach kids about recycling and conservation. So if you can't put the water in your washing machine you can always water indoor and outdoor plants, save it for your garden, or to water your compost pile.

Tip # 2: You may have already seen this on my Facebook, but making your own laundry detergent is a great way to save money. It cleans just as well as other detergents, works great for sensitive skin (I have SUPER sensitive skin), and it does not create build up. You can find the recipe for it by clicking on the word detergent. I did not add the Oxyclean to my detergent and it still cleans just as well. For easy mixing, I put everything in a 5 gallon orange bucket from Home Depot ($5 for the bucket and lid together) and rolled it on the floor to mix it together. Add a scoop (1 tbl) and voila! you will only spend about $16 for 9 months to 1 year worth of laundry.

Tip #3: When mopping, instead of buying Mop N' Glo or any other expensive marketed cleaning agent for mopping floors, just combine Dawn dish soap and white vinegar. If your floors have a lot of extra grime, pour in a dash of ammonia and your floors will be glowing!

Tip # 4: This is not a cleaning tip and may seem very random, but it will save you money and it's good for you! When trying to think of dinner ideas, try to use hearty vegetables that can take the place of a carbohydrate (like rice, bread, pasta, potatoes, etc). These veggies taste great, are very nutritious, and keep you fuller longer. Try substituting spaghetti squash in place of pasta, butternut squash in place of potatoes/ rice, or sweet potatoes in place of white potatoes.  This saves you money because you do not have to cook a starch (therefore buying less of these) and a veggie every night! Just cook a hearty veggie in place of that starch. Watch your waste shrink and a little extra cash stay in your wallet!
Recipe for cooking fabulous, honey-glazed butternut squash:

Ingredients:
1 butternut squash (size based on how many people your feeding, but I would say go with a bigger one as opposed to a smaller one because it tastes so good!)
Honey for drizzling
EVOO for drizzling
Salt 
Pepper

Preheat oven to 350. Peel butternut squash using a potato peeler. Then chop butternut squash into small potato like size pieces (roasting potatoes). Easy way to chop it is to chop between the skinny neck and the butt. The cut each piece in half, then in 3rds and then cut perpendicular to form bite-sized pieces. Place squash on cookie sheet. Drizzle with EVOO. Shake salt and pepper on it. This you just eyeball based on your preference. I prefer less salt so I only put a little, but I love pepper so I put extra pepper. Then squirt on the honey (you can use maple syrup in place of). I would say atleast a tablespoon of honey if not a little more. Stir everything around on the pan until well coated. Pop in the oven and cook for 45 mins. Serve! This will taste amazing and is healthy for you. In a few days I will post a good recipe for spaghetti squash and sweet potatoes. Enjoy!

Tuesday, February 21, 2012

Playtime: 0-6 Months.....Really?


Little M playing in his boppy while I clean
 When I first came home from my son’s (from here on referred to as Baby Boy or Little M) doctor’s appointment, I was completely overwhelmed. There is so much that they tell you to do and soooooooo much more that they leave out. One thing they did tell me to do was to make sure I played with my son and to play with him a lot! Of course, since I was a new mom I was slightly baffled by baby playtime. I mean babies can only do so much and it seems there are tons of resources about fun things to do with your toddler, but not as much about “baby playtime”.  After reading a few books and a couple of weeks with my son I began to learn little things that he liked to do. In case you’re ever in the same dilemma I was, here is a compilation of the baby games I have played with my son up to his current age. 
Playing on his mat
At the pumpkin patch
0 to 3 months:
1. Tummy time w/ a small rattle like toy (increase time as they get older)
2. Have baby track toys with their eyes: move it up and down, side to side
3. Talk to baby about everything your doing
Rub soft stuffed animals or blankets on baby’s skin
4.Gently tickle and laugh at the appropriate time so baby will learn to smile and laugh
5. Hold baby in standing position on counter in front of mirror and play “dancing bear” (my son loved this….we would dance him around on his legs and call him a bear and would giggle and giggle)
6. Read to your baby
7. Snuggle w/ baby
8. Line up the stuffed animals and tell a cute story
Make animal noises to go with stuffed animals
Get baby a play mat
Take baby out and about to see new things

3 to 6 months:
Read to baby
Increase tummy time and include toys baby can grab. Place hands behind baby’s feet and let them push off your hands to scoot across the floor
Play peek-a-boo (hide behind your hands)
Play pat-a-cake
Increase tickle time and teach baby to laugh more
Talk to baby and laugh/ respond to their cooing like you’re holding a conversation
Hide objects in a bucket and rattle them. Then take the items out so baby can see what was making the noise
Let baby tear up paper (My son loves, loves, loves to play with paper. Just make sure they don’t swallow it)
Pounce around like your favorite animal
Describe colors and numbers
Go for walks
Take baby riding in wagons, etc. on your lap
Sing to baby (even if you have a terrible voice they will love it)
Play dancing bear in the mirror
Hold objects over baby’s head in the mirror and have them track the object
Practice rolling over
Take naps together (always fun for mom and for baby)
Make wild noises that they can laugh at
Hold baby on their tummy in your arms and fly them around
Get baby a jumper

6 Months:
Spoons and other objects to bang on their high chair
Soft stuffed animals to chew on (make these animal noises
Teach them cause and effect by tossing something in the air and watching it fall to the ground (describe what is happening
Keep reading to them
Make your conversations livelier and let them participate by babbling, laughing, cooing
Put on music and dance around with them in your arms or let them watch you and laugh
Play in the mirror (try out different facial expressions)
When baby’s head and body control is strong enough put them on your legs and lift them in the air to fly
Sit them on your tummy with on leg on either side and roll up and do sit-ups with them
Put baby on your knee and bounce/ rock them while you hold their hands. (My son loved this especially when we would make noises like he was riding a motorcycle)
Help them stand up and pretend to walk around
Hide behind the couch or other objects and play peek-a-boo
Roll balls and stack blocks
Go people watching (My son loves to watch other people at the store)

Little M and Helpful Husband playing with wrapping paper!
This is just a small list of the things I do to keep my son entertained and learning. Being a former teacher, I know one of the most important things is just engaging your baby in what you’re doing and loving on them. You do not have to have tons of toys and you may not have tons of time of you’re a working mom/ dad. Just talk to them and include them in whatever you are doing. There are many things around the house that can work as toys that don’t cost anything. My son actually loves to get into my stuff more than he likes to play with his own toys. He wants to slap at my laptop, bang the spoons and cups, chew on my sweaters and socks, and do everything I’m doing. The only thing that I would stress for all new moms is to make sure you do tummy time. While Helpful Husband was deployed Little M had 3 adults at his beck and call for 6 months. Between my parents and me, he was almost never put down. When Helpful Husband came home and we moved to Colorado, it was just me and Little M had to learn to like tummy time since I could not hold him all the time. So to avoid needless tears (on mom and baby’s part), give lots of tummy time! Hope this baby info helps and tomorrow will be a health and fitness blog.

Monday, February 20, 2012

My journey as a mother/ homemaker: DIY nightstands!


Me and the Helpful Husband
Wow! Never thought I would actually get around to starting my own blog, but here it is. Where does this journey start? It begins somewhere between when my son was born and when my husband came back from Afghanistan. After his return, we moved to Colorado and I was completely alone with no family support. Being home with my son, inspired me to find creative ways to use my time (nap time is never long enough) and being an army wife, inspired me to find creative ways to stretch my dollar. This blog is going to encapsulate my life and everything along my journey of being a stay at home wife and mother. My life-long dream has always been to be a mother and wife. I am blessed to be able to live this dream. I titled my blog," And You Thought It Was Easy to Be a Stay At Home Mom," mostly because I USED to think this until I became a mother. I used to always ask my mom what she did all day when we were at class, with friends, etc. Now I no longer need to ask. My days are filled with those impossible busy mom/wife moments that are so hard to explain how they could possibly take up so much time, but these moments take up all my time. Hopefully my successes and failures (there will probably be more of these than successes) in cooking, crafting, DIYing (is this a word), child-raising, fitness, everything in between that are recorded here will inspire you to chase your dreams, give you an idea, or at least a good laugh. 


The first thing I want to share is how I spent my weekend. It was full of house decorating, unpacking (those last few miscellaneous boxes that everyone hates), and DIYing. My husband (from here on he will be called helpful husband) and I decided to make our own headboard and nightstands. It was my idea to begin these DIY jobs to save money and helpful husband just happened to get sucked in since he wields the power tools. Below you will find the instructions along with pictures (I always need visuals) for how to recreate these awesome nightstands at your house! These are a fraction of the cost of store bought nightstands.
It all started with a leisurely stroll (very dangerous) through Target (one of my favorite stores). I was looking for storage ideas and happened across this 2-piece cubical (mine is in espresso) and these great storage bins on sale and an idea started to form. After seeing the cubical and cloth drawer, an idea I had seen on pinterest for floating nightstands (found here) came to my mind. I decided these would be perfect for beginner DIYers like myself and helpful husband to create! The nightstands I had seen on pinterest cost about $50 to make. Mine cost a total of $45 and have a drawer to hide things in (you can leave out the drawer and cut the cost by $10). 
Floating Nightstand with Drawer
Both nighstands

Cord hole that helpful husband cut into cubical

Lamp added to nightstand to cover cord hole.


 So how did we make these nifty, cheap nightstands? I am happy to say very, very easily and with little effort (my kind of project). It took an hour tops (with breaks to play with baby boy). We bought the 2-piece cubes from Target and assembled them as instructed. Then we decided how close we wanted them to our bed and made sure they were centered and going to screwed into at least one stud. If you plan on using a lamp, cell phone charger, baby monitor, or anything that needs a cord, be sure to put them next to the plug. You can't see the electrical sockets, but they are to the right of the nightstand. Next, depending on what side your sockets are on, drill the cord hole on the appropriate side. My holes go through the top and bottom of the nightstand. Next, measure and level the nightstands on your wall and then just screw them into the stud. Easy as pie you have two nightstands with a drawer for $45. I have so many cords due to the multiple electronics that I used zip-ties to organize them and keep them detangled. To hide the cords, I plan to stand my books up in front of them. All of the other things I don't want people to see, I hide in my handy little cloth drawer. Good luck DIYers! Go create your own cheap, but cute nightstands! And let me know how it goes.